

If you are an IT professional and have been tasked to create an Azure VM with Powershell for your company in Azure, then this article is for you. By the end of this blog post, you will have an understanding of what it takes to create an Azure VM with Powershell in the microsoft azure environment.
You’ll also know how you can use Powershell commands to do so, as well as some best practices for your deployments. Powershell is the scripting language that can use to automate tasks or scripts, including those related to Microsoft products like Windows 10 and Office 365. It is widely used for managing infrastructure across the microsoft cloud ecosystem and various azure services.
Azure VM Management with PowerShell Commands
Commands like “create-azvm” and “new-azvm” are integral to provisioning virtual machines (VMs) in Azure using Azure PowerShell. These commands streamline the process of deploying VMs by allowing users to define parameters such as VM name, resource group, size, and operating system when configuring an azure vm in the microsoft azure platform.
Additionally, “get-azvm -status” is a crucial command for checking the status of deployed VMs, providing insights into whether they are running, stopped, or in a specific state.
These commands simplify VM management, enabling users to effortlessly create, monitor, and control VM instances within their Azure environment, facilitating efficient resource allocation and usage across multiple azure services. In enterprise environments, VM access can also be integrated with azure active directory for secure identity and access management.
What is Azure Powershell?
The Azure PowerShell module is a powerful and efficient way to manage any of Microsoft’s cloud services. With Azure PowerShell, you can create and manage your resources from the comfort of a Windows terminal within the microsoft cloud infrastructure.
You can automate tasks to make them run on their own even when no one is around with easy-to-use scripts that require little or no coding experience. This makes it easier for administrators to manage deployments across various azure services running on microsoft azure.
Boost your earning potential with Azure expertise. Explore our certified Azure Courses for a high-paying career
- Explore Azure DevOps Certification
What is an Azure Virtual machine?
Azure virtual machine (VM) is a cloud service available on the Microsoft Azure platform. It allows users to create and run virtual machines in Azure data centers, which provide access to software based on Windows or Linux.
Virtual machines are created within “resource groups”, then connected or networked to storage, blob, and Azure SQL databases. These virtual environments are often referred to as an azure vm and are part of the broader azure services ecosystem.
For older versions of Windows, a VNC console can be connected to the VM. Developers sometimes compare cloud-based virtualization like azure vm with local virtualization tools such as virtual box, although cloud platforms offer significantly greater scalability through the microsoft cloud infrastructure.
Additionally, virtual environments such as azure virtual desktop allow organizations to provide remote desktop access to users while keeping workloads securely hosted in microsoft azure.
Let’s Create an Azure VM with Powershell
Creating an Azure Virtual Machine (VM) using PowerShell can be a powerful addition to your journey from “PowerShell zero to hero.” To swiftly embark on this adventure, you can utilize the New-AzVM cmdlet.
With just a few lines of code, you’ll be able to create an azure vm effortlessly within the microsoft azure ecosystem.
By mastering the art of provisioning Azure resources with PowerShell, you’ll elevate your skills from zero to hero, gaining the ability to configure and manage cloud infrastructure with finesse. These automation capabilities are a core part of managing azure services within the microsoft cloud platform.
So, let’s dive into the world of Azure VM creation and PowerShell wizardry to unlock your true potential in cloud computing.
In this Lab, we’ll first configure Azure Cloud Shell in the Azure portal. After that’s done, you can create a resource group and more using PowerShell! Access control and user permissions during these processes can also be managed through azure active directory.
Pre-requisite:
Azure subscription, create one for free if you don’t have one to start using microsoft azure and deploy your first azure vm.
Configure Cloud Shell in the Azure portal.
The Azure Cloud Shell is a free interactive shell that you can use to run the steps in this article. It has common Azure tools preinstalled and configured, so they’ll work with your account out of the box, saving time on repetitive setup tasks. Let’s configure it!!
- Please login
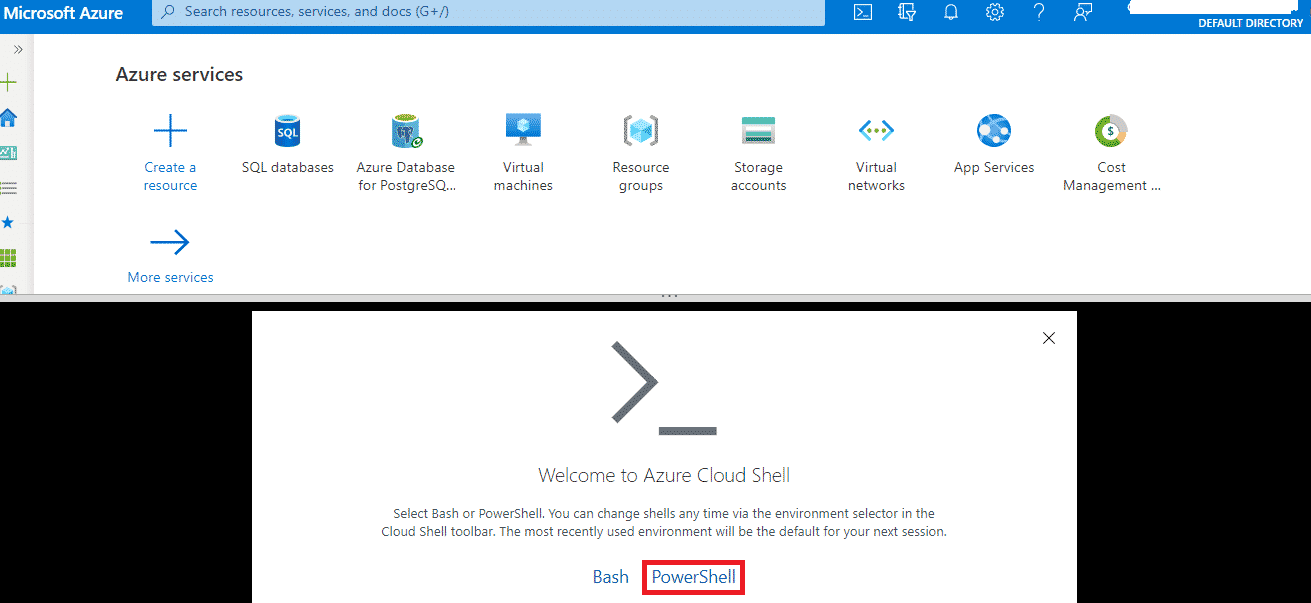
- In the Azure portal, open the Azure Cloud Shell by clicking the icon at the top right; see the screenshot below:

- A new session will open at the bottom of the portal page; please select PowerShell when prompted to select Bash or PowerShell
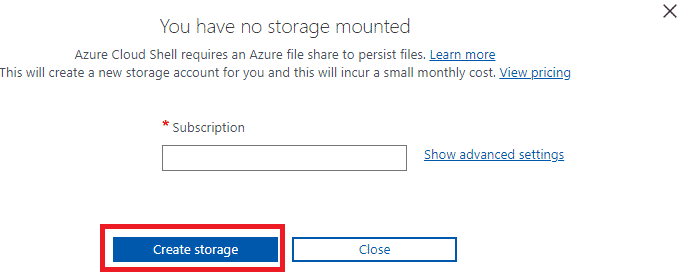
- Next, please click on Create Storage to create a storage account for PowerShell

- Once a storage account is created, PowerShell will launch in the portal.
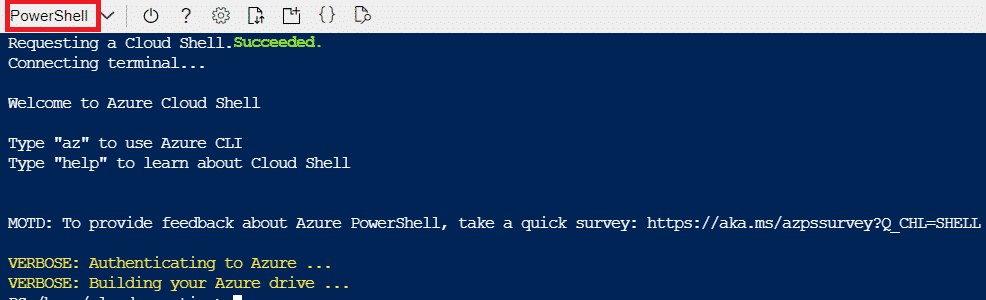
Congratulations!! You have successfully configured your PowerShell in your AZURE Portal.
Now, let’s create a Resource Group and a VM using PowerShell and explore some more PowerShell commands.
- Please make sure your PowerShell tool is open in Azure Portal, which we just now configured.
- Run the below command to create a new Resource Group:
New-AzResourceGroup -Name thinkcloudlylab -Location “South Central US.”
- After successful completion of the command, you will see the below output:

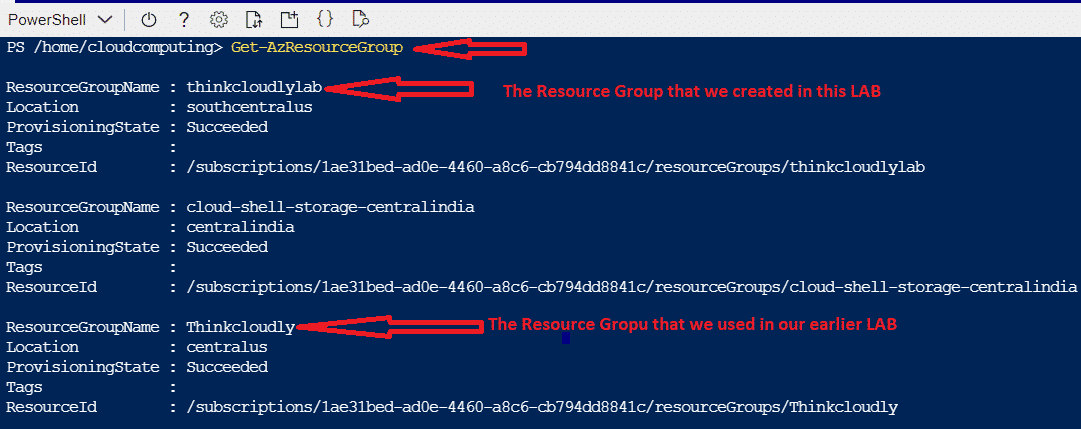
- To get a list of all resource groups in your Tenant, please run the Get-AzResourceGroup command.
- Now, as you have successfully created the resource group, let’s create a new VM; for that, please run the below command:
New-AzVm -ResourceGroupName ” thinkcloudlylab ” -Name “LAB5VM” -Location “East US” -VirtualNetworkName “myVnet” -SubnetName “mySubnet” -SecurityGroupName “myNSG”
- While running the command, you will be asked for the Username and Password. Give both as you want, and wait for the command to get completed.
- Once completed, you can check the list of VMs in Tenant using the below command: Get-AzVM.
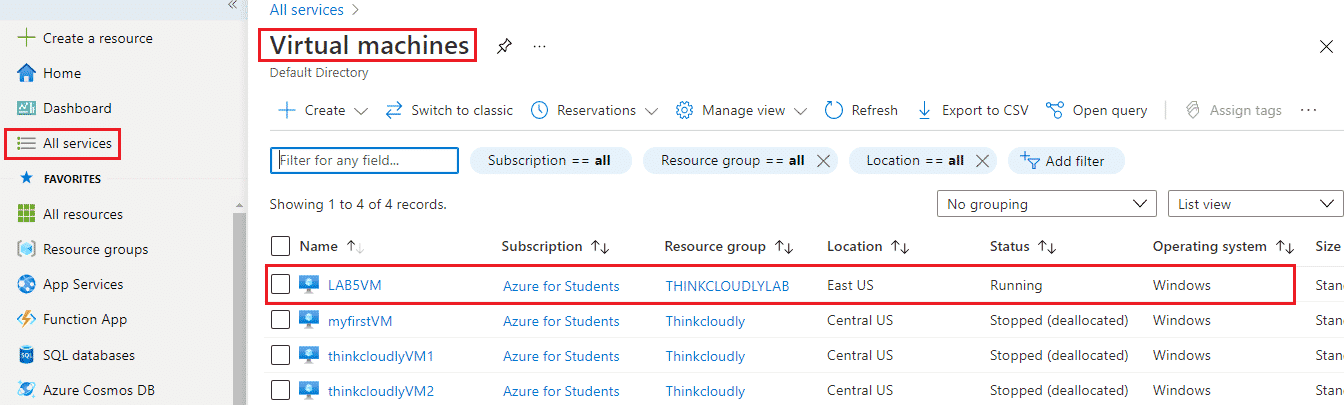
- You can validate the same by searching Virtual machines in All services in the portal and clicking on that as shown below:
Please delete or Deallocate VMs after testing to avoid excessive bills.
To deallocate the VM using PowerShell run the command:
Stop-AzVM -Name LAB5VM -ResourceGroupName THINKCLOUDLYLAB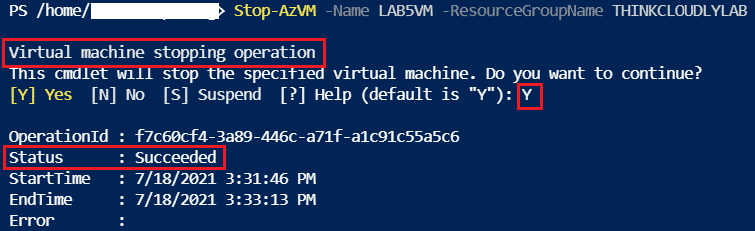
Azure is really interesting to study and it lands you in your dream company. Our students with experience in Azure are making $100,000 on average. Explore our more free resources on Azure:
- Practice with Azure live project training.
- Read the blog over Azure live projects.
- Explore best practices for Azure security in 2022.
- Read top Azure interview questions and answers.
- Don’t forget to register for our Free Zoom Webinars on Azure.
Conclusion:
By the time you are done reading this article, we hope that you feel empowered and confident in your ability to create a VM on Azure.
Using PowerShell to deploy an azure vm simplifies infrastructure management and helps professionals efficiently operate resources within the microsoft cloud environment.
Modern organizations also integrate tools such as azure active directory and solutions like azure virtual desktop to enhance identity management and remote workspace capabilities within microsoft azure.
If not, please let us know what topics or questions need more explanation by leaving a comment. We will do our best to help you get started with as little difficulty as possible.
