

Most people learning AWS networking treat VPC setup as a single checkbox—click “Create VPC,” accept the defaults, and move on. That habit is exactly why so many production incidents in 2026 still trace back to a subnet that was never supposed to be public or a route table nobody remembers editing.
Proper AWS VPC configuration isn’t a formality you get past on the way to EC2 or RDS—it’s the layer that decides whether your entire environment is secure, reachable, and auditable six months from now when someone new inherits it.
This guide walks through AWS VPC configuration from the ground up: what each component does, how to set it up correctly the first time, and where most students and early-career engineers get tripped up. It’s written for people who want to actually understand the “why” behind each setting, not just copy commands from a console screenshot.
What Is a VPC, and Why Does AWS VPC Configuration Matter So Much?
A Virtual Private Cloud (VPC) is an isolated, logically separated section of the AWS cloud where you launch resources inside a network you define—your own IP address range, your own subnets, and your own routing rules. Nothing inside a VPC talks to the outside world or to another VPC, unless you explicitly configure it to.
That’s the entire point of AWS VPC configuration: nothing is reachable by accident. Every open door—a public subnet, an internet-facing load balancer, an inbound rule—has to be deliberately created. Get this layer wrong, and it doesn’t matter how well-secured your application code is; a misconfigured subnet or an overly permissive rule can expose a database that was never meant to see the public internet. Get it right, and you’ve built a foundation that scales cleanly as your architecture grows.
In 2026, with more workloads split across public-facing tiers, private application layers, and isolated data stores than ever before, careless AWS VPC configuration is one of the most common root causes behind avoidable cloud security incidents. This isn’t a step to rush.
Reference Blog: Advanced Private Subnet Designs for Zero-Exposure Cloud Applications
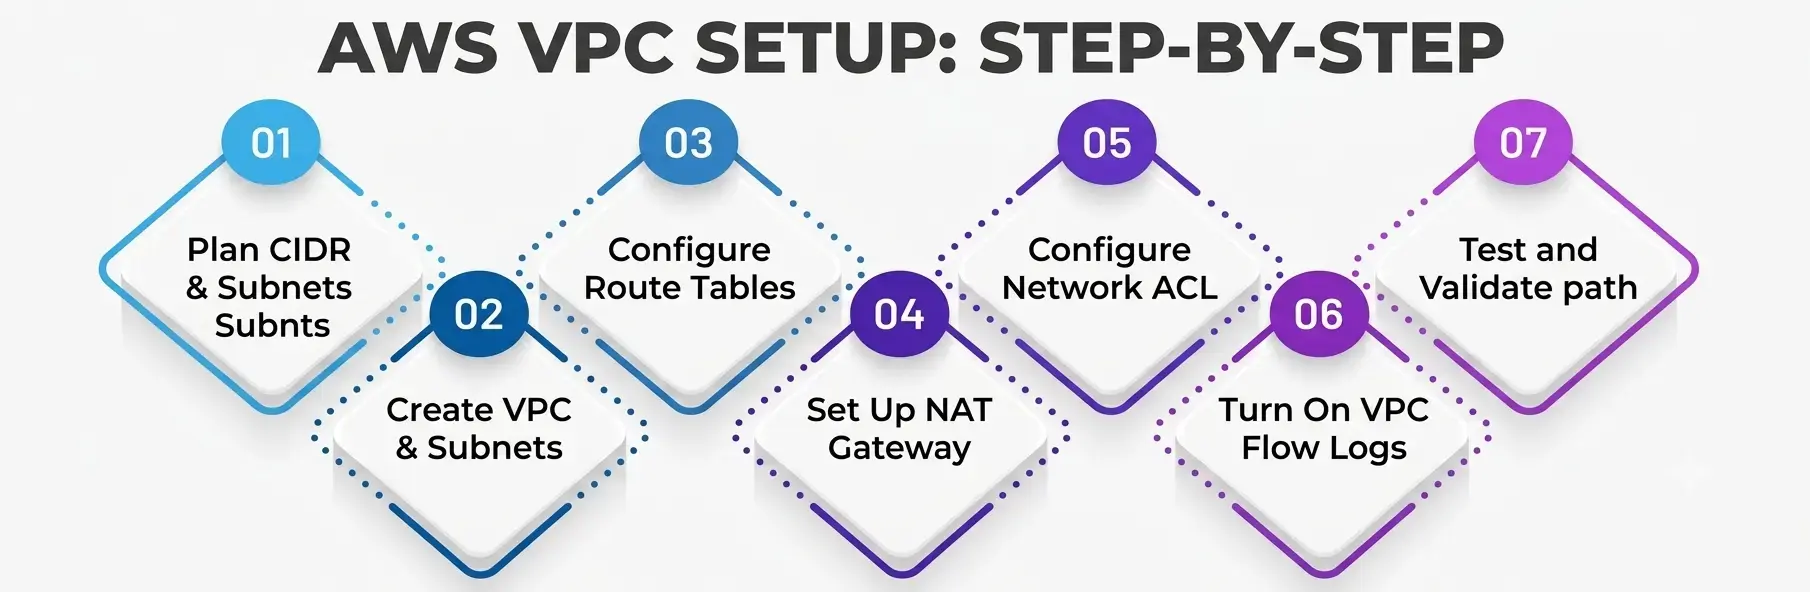
Step 1: Plan Your CIDR Block and Subnets Before You Touch the Console
Before opening the AWS Management Console, decide on your IP addressing scheme on paper. A VPC needs a CIDR block—a range of IP addresses like 10.0.0.0/16—and every subnet you create afterward carves out a smaller piece of that range.
The standard pattern for solid AWS VPC configuration is to separate subnets by function and by exposure:
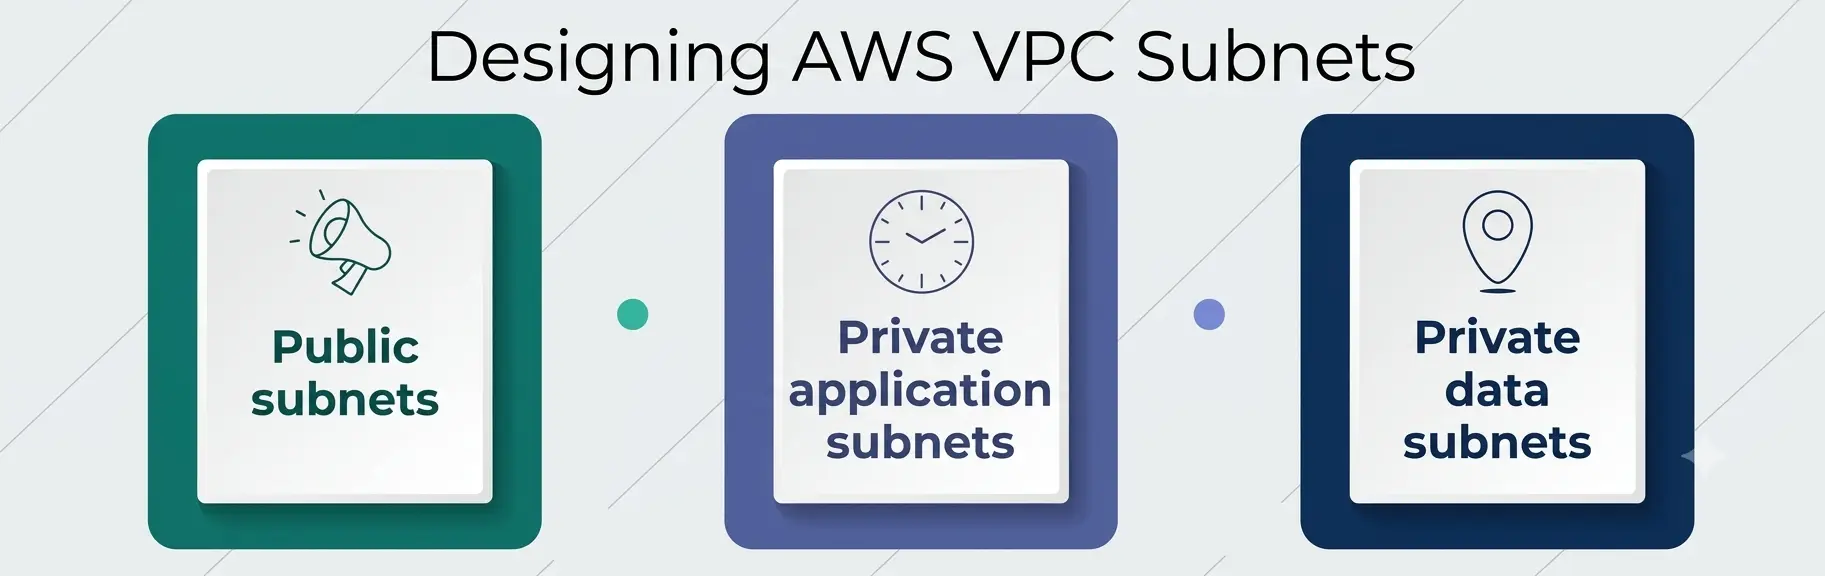
- Public subnets—resources that need direct internet access, like a load balancer or a bastion host.
- Private application subnets—your application servers, which need outbound internet access but should never accept unsolicited inbound traffic from outside the VPC.
- Private data subnets—databases and caches, which typically need no direct internet access at all.
Spreading these across at least two Availability Zones from day one saves a painful re-architecture later, since resizing a live subnet’s CIDR range after resources are running is more disruptive than planning for redundancy up front.
Step 2: Create the VPC and Subnets
With your addressing plan settled, creating the VPC itself is straightforward: specify the CIDR block, name the VPC, and enable DNS resolution and DNS hostnames—both are off by default in some creation flows and are easy to forget, which causes confusing connectivity issues later.
From there, create each subnet inside its designated Availability Zone, assigning the smaller CIDR ranges you planned in Step 1. This is also the point where most reference architectures for AWS VPC configuration recommend attaching an Internet Gateway to the VPC itself, since a VPC has no path to the public internet at all until one exists.
Step 3: Configure Route Tables—Local Route vs. Static Routes
Every subnet is associated with a route table, and this is where AWS VPC configuration starts to feel less mechanical and more like actual network design. Each route table comes with a built-in AWS local route—a rule AWS creates automatically that lets all resources inside the VPC’s CIDR range talk to each other. You cannot delete this AWS local route, and you shouldn’t want to; it’s what makes the VPC function as a single network in the first place.
Everything beyond that AWS local route has to be added yourself, as one of the static routes in the table—a rule pointing traffic toward a specific gateway or device. A public subnet’s route table typically gets one of these static routes sending 0.0.0.0/0 traffic to the Internet Gateway.
A private subnet’s route table instead gets a static route sending outbound traffic to a NAT gateway, so instances can reach the internet for updates and API calls without ever accepting inbound connections directly.
According to AWS’s own documentation on route tables, a subnet is “implicitly associated” with the VPC’s main route table unless you explicitly associate it with a custom one—a detail that trips up a lot of people running through AWS VPC configuration for the first time, because it’s easy to assume every subnet needs manual association when it doesn’t.
Getting the AWS local route and your static routes right is arguably the single most important part of AWS VPC configuration, because a routing mistake here silently breaks connectivity in a way that’s often harder to diagnose than a security misconfiguration—traffic just disappears instead of throwing a clear error.
Step 4: Set Up a NAT Gateway for Private Subnet Internet Access
Instances in a private application subnet still need to download packages, call external APIs, or reach AWS services outside the VPC—but they should never be directly reachable from the internet. That’s exactly the problem a NAT gateway solves.
A NAT gateway sits in a public subnet, has its own Elastic IP address, and translates outbound requests from private instances so responses can find their way back—while blocking any unsolicited inbound connection attempt. This asymmetry is the whole reason a NAT gateway matters in any serious AWS VPC configuration: private resources get one-way internet access, never two-way.
Practical setup notes worth knowing:
- A NAT gateway is created inside a public subnet and is tied to a specific Availability Zone, so production environments typically deploy one NAT gateway per AZ rather than a single shared one, to avoid a single point of failure.
- The private subnet’s route table needs a static route sending outbound (0.0.0.0/0) traffic to that NAT gateway.
- AWS’s NAT gateway documentation notes that a NAT gateway is a managed service, meaning AWS handles scaling and availability within the AZ, but it’s billed hourly plus a per-GB data processing charge, which is worth factoring into any cost estimate for larger environments.
Skipping the NAT gateway step and leaving private subnets with no outbound path at all is a common early mistake—it usually surfaces the first time someone tries to run a software update on an instance, and the connection simply times out.
Step 5: Configure a Network ACL for Subnet-Level Security
A network ACL is a stateless firewall that operates at the subnet level, evaluating every rule in numbered order for both inbound and outbound traffic. This is different from a security group, which is stateful and attaches to individual resources rather than an entire subnet.
Because a Network ACL is stateless, you have to explicitly allow both directions of traffic—an inbound rule permitting a request doesn’t automatically permit the matching response, the way it does with a security group. That single distinction is where most people misconfigure their first Network ACL: they allow inbound traffic on a port, forget the matching outbound ephemeral port range, and spend an hour debugging a connection that should have worked.
AWS’s documentation on custom network ACLs recommends starting from a default-deny posture and adding only the specific rules a subnet actually needs, rather than starting permissive and trying to lock things down later. A well-planned Network ACL adds a second, subnet-wide layer of defense underneath your security groups—so a single misconfigured security group doesn’t automatically expose an entire subnet.
For most teams, a Network ACL isn’t the primary access control mechanism (security groups usually carry that weight), but it’s a meaningful safety net, especially for isolating a data subnet from anything outside its own CIDR range.
Step 6: Turn On VPC Flow Logs for Visibility
None of the previous steps matter much if you can’t see what’s actually happening on the network afterward. VPC flow logs capture metadata about the IP traffic flowing through network interfaces in your VPC—source, destination, port, protocol, and whether the traffic was accepted or rejected—without capturing the packet contents themselves.
Enabling VPC flow logs is one of the cheapest investments in a solid AWS VPC configuration, because they answer the exact question you’ll need answered during an incident: was this connection allowed, and by which rule? Flow logs can be published to Amazon CloudWatch Logs for near-real-time analysis and alerting or to Amazon S3 for cheaper long-term storage and later querying with a tool like Amazon Athena.
Per AWS’s guidance on flow log usage, flow logs can be enabled at the VPC level, the subnet level, or on an individual network interface, and the resulting data is invaluable for confirming that a Network ACL or route table change actually did what it was supposed to do.
Teams that skip VPC flow logs at setup time almost always end up turning them on retroactively, usually right after an incident they had no visibility into. Turning on VPC flow logs from day one avoids that gap entirely, and it’s a small enough step that there’s rarely a good reason to defer it.
Step 7: Test and Validate the Full Path
Once the VPC, subnets, route tables, NAT gateway, Network ACL, and VPC flow logs are all in place, don’t assume it works—verify it. Launch a test instance in each subnet tier and confirm the behavior you expect: the public subnet instance should be reachable from outside, the private application instance should reach the internet outbound through the NAT gateway but not be reachable inbound, and the private data subnet should have no direct internet path at all.
Check the VPC flow logs during this test phase — a rejected connection you expected to succeed, or an accepted one you expected to be blocked, shows up there and is faster to diagnose than guessing from application-level symptoms.
Common Mistakes in AWS VPC Configuration
A few patterns show up repeatedly, even among people who’ve done this before:
- Forgetting to associate a custom route table, leaving a subnet on the main route table by default, and inheriting rules that weren’t intended for it.
- Treating a Network ACL like a security group, forgetting that stateless rules need explicit outbound entries to match inbound ones.
- Sharing a single NAT gateway across every Availability Zone, creating an unplanned single point of failure and unnecessary cross-AZ data transfer costs.
- Never enabling VPC flow logs until after an incident, losing the exact visibility that would have made the incident easier to diagnose.
- Overlapping CIDR ranges between VPCs that later need to be peered or connected, which forces a costly re-addressing project instead of a straightforward connection.
AWS VPC Configuration Components at a Glance
|
Component |
Purpose | Scope |
Key Detail |
|
VPC |
Isolated virtual network | Regional |
Defined by a CIDR block you choose |
|
Subnet |
Segment of the VPC tied to one AZ | Availability Zone |
Public or private, based on its route table |
|
Route table (local route) |
Automatic in-VPC routing | VPC-wide |
Cannot be deleted or edited |
|
Route table (static routes) |
Custom traffic routing | Per subnet |
Sends traffic to gateways like IGW or NAT |
|
NAT gateway |
Outbound-only internet access for private subnets | Per AZ (recommended) |
Managed, billed hourly plus data processed |
|
Network ACL |
Stateless subnet-level firewall | Subnet |
Requires explicit inbound and outbound rules |
|
VPC flow logs |
Traffic visibility and auditing | VPC, subnet, or ENI |
Sent to CloudWatch Logs or S3 |
A Personal Note
The first VPC I ever built by hand had a private database subnet that could somehow still reach the internet — I’d copied a static route from a public subnet’s route table without thinking about what it actually did, and didn’t notice until I went looking for it weeks later. Nothing bad happened, but it easily could have.
That mistake taught me more about AWS VPC configuration than any tutorial did, because it forced me to trace every route, every Network ACL rule, and every NAT gateway path by hand instead of trusting the console defaults had done the sensible thing.
If you’re a student working through this material, build a VPC from scratch at least once without following a template, break something on purpose, and then use VPC flow logs to figure out exactly what you broke. That exercise sticks with you longer than any diagram.